Here you will find the Carolina Carnage HMB 2021 event results and YOUTUBE footage of the fights with breakdown and analysis.
Fight #1 Warlords White VS. Knyaz
Warlords White are considered a powerhouse team. Knyaz are the new kids on the block because they’re recently formed from the break up of some previous groups. While the match up seems one sided, Knyaz goes in ready to fight.
Match #1
For the first minute and a half, the underdogs put up a tough fight. For almost 40 seconds, one of the Knyaz rail men has a hold of two warlords. The free man on the Knyaz team has his back turned to the double team and is watching two one on one fights on the opposite rail. When the Knyaz axe man does turn to finally engage the two on one matchup, he attacks the fighter with a free shield hand. The Warlord is able to defend the axe shots and the axe man is confronted from the rear by another warlord.
When his teammate comes from the far side to assist, the new Knyaz fighter loses the head of his axe from a top down strike onto a helmet. As he attempts to pull his back up, he’s taken down. Seconds later Knyaz loses their second fighter because he attempts a head over taken down and it slips off causing the Knyaz fighter to fall to his back. The tides are turned against the team and the fight is won by the Warlords.
ANALYSIS
Knyaz lost this match because of two fatal mistakes: 1. The center/free radical did not capitalize on his rail man holding two opponents at once. His engagements during that time were pensive and non specific. He was not able to switch his stance/swing direction and strike with a left handed hit. Being able to do so would have allowed him to do significant damage to the exposed fighter tied up on the far rail.
And, 2. The fighter that came across the rail ran into the center of the pit of people. If this fighter would have stayed back and swung at legs and shoulders, he wouldn’t have lost the head of his axe immediately. And… because of this, he had to draw his back up weapon. The secondary mistake was him attempting to do so when he was a step off the rail with an opponent behind him. He should have sought safety first… then drew his back up.
Warlords did an excellent job of weathering a storm. Knyaz came out to fight and they stayed calm, played it cool, and waited for an opportunity. All their fighters have a ton of stability on their feet.
The video starts at the area of primary analysis.
Match # 2
At 12 seconds in, Knyaz loses a wingman on the far rail. This initiates a fatal cascade against Knyaz. At 20 seconds into the match, it is 5 on 1 and the battle is won by the Warlords.
ANALYSIS
Knyaz fighters gave their all in the first matchup and came out tired. Warlords had a deeper gas tank and were better able to manage their energy to be ready to fight the second round.
FIGHT #2 Ordo Draconis VS Warlords Black
Ordo Draconis is considered a top tier team in American Buhurt. The match up against Warlords Black is not a foregone conclusion. Even though they are a group of newer fighters, they train hard with the Warlords White top team.
Match #1
Ordo Draconis wastes no time initiating attack. Almost immediately, a Warlord flanker tries to head into the Ordo backfield and trips. Ordo uses the 5/4 advantage to double up on another Warlord. The Ordo flanker/axe man uses hard hits to drop another Warlord with his back to the arena. The fight nears an end when both flankers use hard hits to initiate movement on another Warlord against the rail then quickly pushing him over a downed teammate.
ANALYSIS
Ordo showed a depth of experience by allowing the younger team to make mistakes in their favor. Both Ordo flankers effectively utilize two handed weapons to drop opponents, create movement and change up the battlefield. The fight ends in just over thirty seconds. Warlords Black showed some initiative and heart but the breaking point occurred due to a lack of sure footedness and one fighter leaving their back exposed to the arena.
Match #2
Warlords Black comes out with a full line up of weapon and shield. The immediate drawback is that there is no single person that can do break away damage for the team. While they present as a team such as Partisan One that plans on grinding it out hard on the rail, they lack the grappling acumen at this point. But, with that said, they come out hard and push immediately to the rail. Warlords Black do a good job of forcing the fight where they want it immediately.
Ordo responds by keeping their center position back to do hard hits with a two handed weapon against Warlords locked up on the rail. The Warlords center pushes to engage and the entire Warlords team keeps the fight hard on the rail. Ordo takes the lead by allowing a two on one in one place so they can two on one and take down a Warlord. The Warlords fight back and immediately win their two on one to make the fight equal. Ordo again fights back and wins a one on one battle. The cascade starts and the fight ends seconds later, going to Ordo.
ANALYSIS
Warlords Black tried to bring the fight to their strengths on the second round. They initially did a good job of keeping the fight one on one. They lost because their overall wrestling wasn’t of the same caliber as Ordo. Ordo was able to win a one on one battle and keep the advantage. When Warlords Black fighters were at a man disadvantage, Ordo capitalized on it with heavy damage dealing two handed weapons and won the fight.
Ordo/Warlords match number two:
FIGHT #3 Cerberus VS Knyaz
While both these teams are less than a year old, Cerberus has some veteran fighters on it where Knyaz has some incredible athleticism.
Match #1
Both teams wasted no time in initiating an attack. Knyaz fights hard and fast and quickly takes down a wingman on the near rail with a trip. Attempting to utilize the advantage, they fight two on one against the near rail with their axe man dealing hard blows. The near side rail Cerberus fighter takes down his opponent and so does the Cerberus center. The advantage shifts to Cerberus where they press their advantage. One Knyaz fighter is dropped with a single shield punch to the helmet and another pulled down. The fight ends in 35 seconds.
ANALYSIS
Knyaz got a fast advantage with a quick initial takedown against Cerberus. They should have pressed to the rail one on one and allowed their free man to deal some heat with axe blows. Their center did initially attack the near side rail but his hits didn’t continue. Also, Cerberus center is highly adept at open field fighting and he was able to further swing the fight with two open field takedowns in ten seconds.
Match #2
Cerberus comes out on the far rail and presses to initiate the fight. The wingman switches positions, runs the rail and the rail man on Cerberus engages the much smaller Knyaz wing. Cerberus has a fast takedown from the size match up and gains a 5/4 advantage 17 seconds into the fight. Another Knyaz fighter gets taken down in a one on one and in the melee, a third Knyaz fighter goes down from a simple trip. The final Knyaz fighter goes down 45 seconds into the fight for a second loss for Knyaz.
ANALYSIS
Knyaz initial attack is aggressive. The switch up on the top rail created a quick advantage for Cerberus. While Knyaz out athletes Cerberus, their one on one wrestling was not on the same level. Cerberus won the fight with finesse.
FIGHT #4 PK Swamp Foxes VS Plague Rats
Both these teams enter the list with veteran fighters, athletic fighters and a ton of grit.
Match #1
The battle starts with a ton of mobility. Both teams move all over the field and the fight is spread out across the entire list. Plague rats take the advantage at twenty seconds in when they get the first take down. The same fighter immediately takes another Swamp Fox down, across the field a third Swamp Fox goes down in a suicide take down with PK now at a 4/2 disadvantage. At 45 seconds into the fight, a Swamp Fox fighter gets a takedown and the Plague Rotten advantage is reduced to 3/2.
When that fighter rolls and steps backward off the rail he’s pushed down. Plague Rotten loses a fighter in the press and they carry a 2/1 advantage. The next several minutes are a great show of a Swamp Fox fighter staying up despite the disadvantage. The fight is timed out and won by Plague Rotten due to a 2/1 final advantage.
ANALYSIS
The fight shifted to favor Plague Rotten at the first takedown. When a PK fighter put his back to the arena, he was quickly taken down by an approaching opponent. The same Plague Rotten fighter was able to do a head lock takedown of the other PK fighter on that rail almost immediately. Two PK fighters showed fortitude and smarts when they stayed tight to each other and fought off the rail. Plague Rotten crowded them because they didn’t have a two handed weapon to deal damage.
When PK was able to quickly reduce the advantage to 3/2, they should have pressed hard and fought back to back against the rail. Stepping away from the rail lost the fighter for PK. PK Swamp Foxes showed incredible resilience and ability to stay up on the rail. Plague Rotten did not have a fighter switch out to a two handed weapon despite their advantage. Doing so would have likely ended the fight sooner to their advantage.
The video starts at the beginning of the first Plague Rotten/PK Swamp Fox match up.
Match #2
At less than 20 seconds in, PK loses a fighter from an open field trip. Plague Rotten gets another takedown 35 seconds in but PK responds with a fighter taking two fighters with him as he goes down. Despite some quick victories, Plague Rotten only has a 3/2 advantage. at 55 seconds in, Plague Rotten is able to take another fighter down for the win.
ANALYSIS
This fight ended quickly for two reasons. 1. PK had some very tired fighters AND second string fighters in the arena. And, 2. Plague Rotten pressed hard despite their tiredness and was able to turn the tide fast. Violence of action can overtake an opponent despite a level playing field.
FIGHT #5 Warlords White VS Cerberus
These are two top tier teams. They both come with a deep arsenal of fighters. And… Since I’m the Captain of Cerberus…. I know everyone’s name 😀
Match #1
Both teams come out tentatively. The fight starts on the rails with one on one matches across the list. Both teams tie up. On the topside rail, Cerberus fighters are locked down by Warlords and vice versa. On the bottom side rail, Warlords fighter (Brett Skinner) fights against the rail while Cerberus fighter (Johny Porter) fights off the rail. Brett is able to use his strong Judo skills and take Johny down as Johny tries to step out and past Brett. The advantage is 5/4 Warlords. Both Warlords on the bottom rail fight against the lone Cerberus fighter and reap his legs in opposing directions taking him down.
The advantage grows 5/3 to the Warlords. On the top rail, a Cerberus fighter (Micah Krug) holds his own against the big blue helmet axe man of the warlords and even when he’s at a 2 vs 1 disadvantage. The secondary Warlord gives up against Micah and moves to press another fighter. Four Warlords circle against two Cerberus in the corner and work to create an opening. A Cerberus fighter (Matthew Creedican) comes out and tries to get a take down but Warlords defend well. Creedican is told to take a knee by the Marshals (still not sure why) and the Warlords have a strong 5/2 advantage with the two brothers Micah and Daniel left. Warlord Captain (Brennon Freeman) steps, gets a head lock on Daniel and leans forward for a takedown. Warlords grind out a strong victory.
ANALYSIS
Both teams have strong wrestlers and strong takedown skills. The victory is in the initial match up. Brett Skinner is the most dangerous weapon in the Warlord roster and he’s able to slice a deep cut into the Cerberus lineup by taking down Johny Porter quickly. Warlords play and fight smart and use 2 vs 1 advantage very well and very quickly. The strength of the Warlords fighting is in knowing their strength. They use it at every turn and force Cerberus to make mistakes. (Spoiler alert) While Warlords win all the match ups against Cerberus, they’re forced to work hard for every one.
Match #2
Cerberus comes out with a few changes in their line up. The teams engage and the Cerberus wing man from the top rail runs across the list. Rail man on the top side fights hard in a two on one with a Warlord advantage. One Warlord breaks his axe and the Cerberus fighter tries to keep him tied up. The Cerberus center pushes to the top rail to attempt a takedown and both fighters go down. Shortly after, Warlords on the bottom rail use their strong wrestling and quickly pile two Cerberus fighters on top of each other. The lone Cerberus fighter on the top rail gets his armor broken open, and the fight is called for the Warlords.
ANALYSIS
Again, Warlords use strong wrestling and calm demeanor to beat the newer team. While Cerberus (again, I’m biased… I know) has a ton of fire in their belly, Warlords are methodical and smart. This fight was won by playing to Warlord strength. As far as what Cerberus could do different and what Warlords have as potential weaknesses….. Well, as the Captain of Cerberus, I feel duty bound to keep that to myself. Sorry.
FIGHT #6 Ordo Draconis VS PK Swamp Foxes
This match up pitches two seasoned teams against each other. Ordo has the advantage with a deeper roster and some highly experienced/skilled fighters.
Match #1
The top rail of Ordo wastes no time and runs to meet their opponents. This creates an echelon effect allowing the Ordo flankers to start running cross checks into PK Swamp foxes. The first cross check ends in a “simul” take down with one from each team going down. Both teams have a two on one battle going in opposite corners of the list. Ordo wins their disadvantaged two on one in the bottom left of the list and that fighter runs up behind a Swamp Fox to pull him, a fellow Ordo and another Swamp Fox to the ground. This creates a 3/1 advantage and the fight is stopped. Ordo with the win.
ANALYSIS
PK had a 2 vs 1 advantage in the bottom of left of the list. One fighter left to engage in a different part of the field. Soon as he did, the other PK went down. The Ordo fighter was smart and moved up to pull the Swamp Fox down because his back was turned. PK has a chance to do some damage or lengthen the fight with Ordo if they try to force a one on one. There are some strong grapplers on the PK team, they need to be front and center in the PK strategy.
Match #2
PK comes out swinging with a fast cross check against Ordo. The gamble doesn’t pay off because both teams lose a fighter and the odds are still even. Ten seconds later another PK fighter goes down from a shield punch by one of the strongest fighters on the Ordo lineup. PK takes another loss from shield punches and a hard takedown. Ordo with a 4/2 advantage uses one of their Axemen/flankers to chop down one of the two remaining Swamp Foxes. Ordo wins the match up.
ANALYSIS
Even though Ordo loses a fighter quickly, they stick to their battle plan and execute it perfectly. Their strong rail men are easily able to turn the tide. The final blow being dealt by a Flanker/Axeman shows how lethal the position can be.
The video starts at the end of the second match where the Ordo flanker walks across the field to chop down a Swamp Fox.
FIGHT #7 PK Peacocks VS Knyaz
This is an even match up. Both these teams have a good mix of new and seasoned fighters with a comparable set of skills.
Match #1
The teams exercise a standard line up approach. Both centers stay back and survey the field for an opportunity. On the near rail, the Knyaz wingman presses the Peacock wingman with hard axe shots as the rail men grapple. Knyaz rail gets the first takedown. The melee pushes into the near left corner and a Knyaz fighter leaps in to try and pull a head down, but just falls instead. The fight pushes to the far side and Knyaz misses an opportunity for a takedown and takes axe shots instead. A Peacock loses the fight in the corner and goes down. It’s 4/2 Knyaz. The final fighter goes down in the corner and Knyaz grinds out a decisive win.
ANALYSIS
Knyaz dominated the fight but missed some opportunities. The dynamic and athletic center jumped in the air in a full suit of armor only to miss his attempt and fall to the ground. The axe man that started on the near rail rained down shots early on, but was slow to transition to wrestling when opportunity arose. The Peacocks showed determination and staying power by fighting hard on the rail. Full court awareness by all wingmen and centers on both sides would have allowed for a cross check opportunity by either team. These teams showed toughness. They are diamonds in the rough for sure.
Match #2
The fight starts with the centers testing each other out. A simultaneous takedown on the top rail quickly makes the match 4/4. the melee presses in the bottom left corner and the Knyaz center shows excellent field awareness by checking over his shoulder after every two shots. A one on one match up on the top rail ends with a Peacock advantage. The Knyaz fighter stepped and rotated off the rail which allowed for the Peacock takedown. The fight on the near rail collapses with the three remaining Knyaz fighters going down and taking two peacocks with them.
ANALYSIS
Peacocks used their line up well and kept the fight on the rail. They were able to use their grappling skills against a dynamic team to quickly cascade to a victory. While just having suffered a loss to Knyaz, this showed a high level of spirit among the Peacock ranks.
Match #3
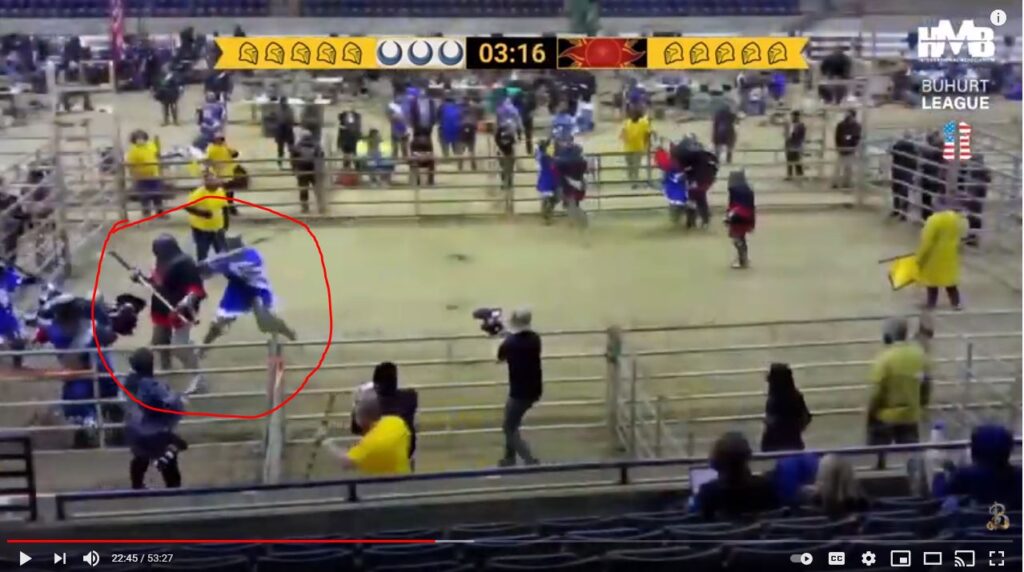
Peacocks on the top rail waste no time closing the gap. This gives the overall formation in the list an echelon shape. The melee flies all over the list and the first Peacock goes down on the top rail. The 5/4 advantage is lost when Knyaz fighters move off the top rail and lose sight of a Peacock picking up a weapon. An excellent check from the back drops one Knyaz and another quickly goes down with a takedown from the rear.
Peacocks take a 4/3 advantage and the same Peacock drops a THIRD FIGHTER trying to run him down!!! A Peacock trips on the near rail but they still hold the advantage. The fight is packed into the near left corner with two Knyaz remaining. The final Knyaz goes down and Peacocks take the win.
ANALYSIS
At 3:19 on the timer, the Peacock center has an opportunity to check a Knyaz fighter from the rear. Instead of a hard check, he opts to take an axe strike and misses.
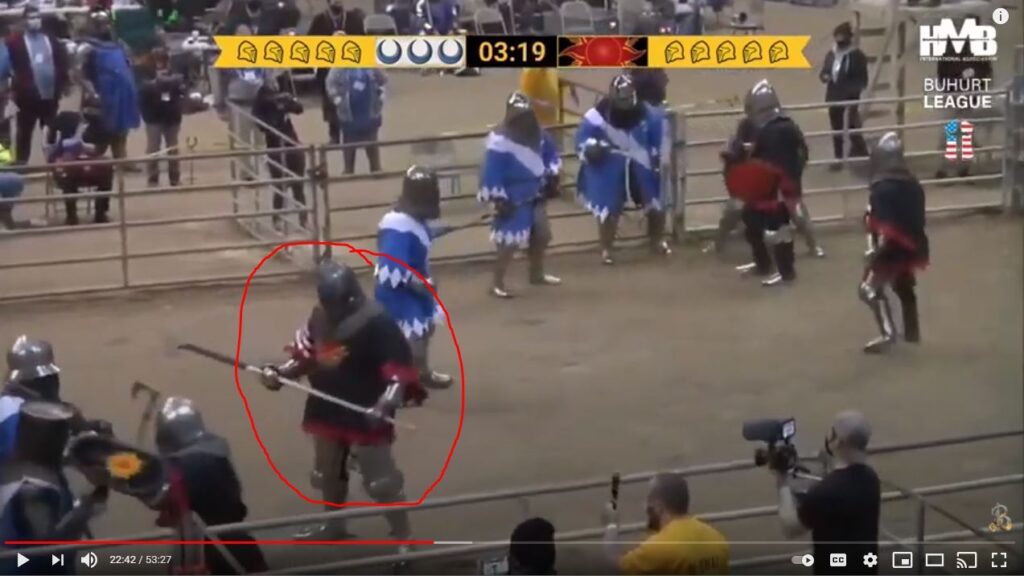
Tactically, a check from the back could have dropped the fighter where an axe strike hurts, but also gets their attention. The top side wingman for the Peacocks later checks a Knyaz fighter from the back and gets a takedown. This fight was won because the top side Peacock wingman showed amazing field awareness and took every advantage given. He swung the fight in his teams favor and stayed on his feet. When a team has fighters that fight the ENTIRE field, the battle shifts very quickly. This is an excellent example of that.
FIGHT #8 Plague Rotten VS Warlord Black
Both these teams have shown a willingness to fight the entire field and do a lot of damage when given the opportunity. The match up is fun to watch.
Match #1
The fight starts with all fighters flying everywhere in the list. The first Plague Rotten goes down when he trips attempting to run across to the top right corner. The first warlord goes down in the top right corner despite a 2vs 1 advantage there. The continued 1vs1 in the top right ends when a Warlord comes in with a hard cross check. A simultaneous trip happens and Warlords Black wins with a 3/1 advantage. The fight took under a minute.
ANALYSIS
Both teams showed a lot of dynamic movement. The field awareness was decent on all sides. The advantage happens when a Warlord sees an opportunity to cross check. As is the case with most battles, the team with the better field awareness will win.
Match #2
Plague Rotten comes out in a 2/2/1 formation with an intentional disadvantage on the near rail. As the fight develops, no clear advantage is gained and 1vs1 is all over the list. Plague Rotten wins a matchup and takes a 5/4 advantage on the top rail. Bobby D goes down shortly after and the advantage is lost. A simultaneous takedown happens soon after and the fight is 3/3 on the bottom rail. But Plague Rotten fights hard and soon gains a 3/2 lead. The fight is stopped with a Plague Rotten win at 3:32.
ANALYSIS
Even though most takedowns were quickly equalized, one Plague Rotten fighter kept pushing the advantage and took three opponents down himself. Despite the high energy and good grappling of Warlords Black, Plague Rotten was able to leverage the good field position and awareness of one fighter to take the win.
Match #3
Plague Rotten once again comes out in the 2/2/1 formation. As Warlords press, they collapse into an echelon with the top rail as point. The melee spreads across the list and Plague gets a takedown with a hard cross check near the bottom right rail. A Warlord trips while trying to move and it is 5/3. Two more warlords go down near the bottom rail and Plague Rotten wins the match up.
ANALYSIS
While Warlords black has energy and strength, Plague Rotten showed determination and a steady hand. The fight was won because Plague Rotten managed their gas tank through the three fights and pressed advantage where they found it. Their 2/2/1 formation didn’t pay off the first time, but the second time was able to create a strong cross check opportunity.
FIGHT #9 PK Peacocks VS Cerberus
This fight pits the seasoned Peacocks against the brand new Cerberus. Both teams have shown tenacity in the tournament thus far. The match up promises to showcase strength from both teams.
Match #1
Both teams meet in the center of the list. Axe strikes rain down on the Cerberus near rail man. At 15 seconds in, the first Peacock goes down with takedown by the Cerberus Captain. (This takedown will be discussed in the analysis). Seconds later, a second Peacock goes down in the top right rail. With a 5/3 advantage, Cerberus presses with axe strikes and hard wrestling. The Cerberus center beats his matchup and another fighter goes down on the top rail. Cerberus wins 5/1 in 26 seconds.
ANALYSIS
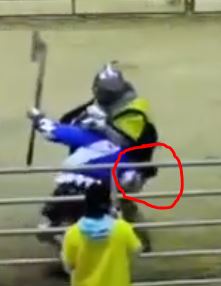
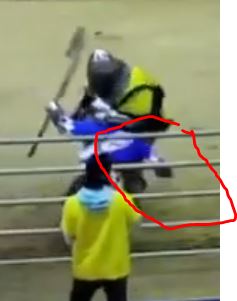
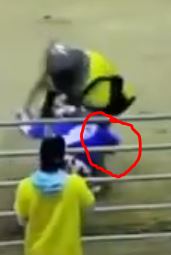
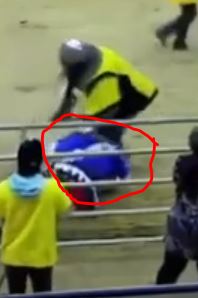
The fight was heavily one sided in Cerberus favor. The Cerberus team has experienced wrestlers and a top tier starting line up. While the peacocks have a ton of spirit, the odds proved insurmountable. —- Now to that takedown on the bottom rail. This is being discussed because the Peacock fighter did what Cerberus refers to as a death hook… As a fighter goes down from a head pull, they attempt to reach and hook the leg of the standing fighter. This means their loss isn’t one sided and they can often take the opponent down with them. The danger in doing this is when the death hook ends up sliding to the ankle of the standing opponent. As that happens, the shoulder is driven into the front side of the knee causing it to hyper extend and risking significant injury to the standing person.
While this isn’t “Illegal” it does skirt the issue and is in the gray. Intentional joint locks aren’t allowed, and while this isn’t directly intentional, it does have an extreme high likely hood of ending up in one. So… Consider the next time a “death hook” gets thrown out there and the damage it could potentially cause to another person. Knees are very protected in this sport for a reason. Let’s work hard to take care of each other. If you watch the video, it takes place from 29:38 to 29:43. Play it at half speed and you can see the “death hook” get thrown. Here are still shots of the maneuver. It is clearly an attempt to reap the leg while going down. — Again, this isn’t illegal, it just is “grey” and risks injury when you drive your shoulder into the knee of an opponent while hooking their ankle.
Match #2
Peacocks come out swinging. They hit Cerberus hard and press against them on all fronts. The Peacock wingman on the bottom rail moves back and sneaks up near the top rail to check against the Cerberus center. His back is exposed and Cerberus captain reaps a takedown from the rear. At the same time, another Peacock goes down in the top right corner. Another Peacock immediately goes down on the top rail. And Cerberus gets another kill in the top right corner to make it 5/1 for the win at 22 seconds into the match.
ANALYSIS
This fight was fast and lethal in typical Cerberus fashion.
FIGHT #10 Ordo Draconis VS Plague Rotten
Plague Rotten takes a knee giving the victory to Ordo.
FIGHT #11 Warlords White VS PK Peacocks
Warlords White is a top tier team, but the Peacocks have shown grit and savvy. It’s gonna be a fun fight to watch.
Match #1
As Warlords press, the Peacocks collapse into an echelon with the bottom rail as point. Warlords get 3 takedowns back to back about 30 seconds in with a 5/2 advantage. The final two Peacocks go down five seconds later and the Warlords win.
ANALYSIS
Warlords show their brute strength and amazing grappling yet again. Their axe strikes also demonstrate depth to a skill set they’ve mostly kept hidden. Peacocks stood against a tide and lost.
Match #2
The match starts with a standard line up on both sides. A Peacock fighter tries to move around a fight on the near rail and gets tripped by a Warlord. Another Peacock is dropped on the top rail and it’s 5/3 to the Warlords. All three Peacocks lock in tight on the bottom rail and try to weather a storm. Two Peacocks go down back to back and the fight is won 5/1 30 seconds in.
ANALYSIS
Warlords used this match up to practice their axe strikes with lethal precision. Backing that up with dominate grappling made for a quick fight.
FIGHT #12 Warlords Black VS PK Swamp Foxes
Both teams want a fast win. They’ll come out to prove it too.
Match #1
A Swamp Fox at the bottom rail charges into the Warlords and immediately trips giving the Warlords a 5/4 advantage 4 seconds into the fight. A second Swamp Fox is chopped down by a Warlord. Another Swamp Fox gets pulled down on the top rail and it’s 5/2 Warlords. The final two warlords show a ton of grit and fortitude by standing against incredible odds and standing strong. One fighter stays up in a 3vs1 while the other is in a 2vs1. The Swamp Fox in the top left of the field gets dropped with axe shots three minutes into the fight.
ANALYSIS
The Warlords took a quick advantage given to them by a fast trip 4 seconds into the match. In spite of this, the Swamp Foxes proved hard to kill as they fought against a 5/2 disadvantage for almost three minutes. This fight shows that a warrior heart is hard to beat when determination shines through.
Match #2
Both teams are slower to engage, but the Swamp Foxes are the first to lose a fighter 45 seconds into the fight. Only ten seconds later the fight is won by the Warlords 5/1. takedowns happened fast.
ANALYSIS
PK Swamp Foxes were swamped by the Warlords Black fast action. Warlords black capitalized on the cascade and dominated quickly.
FIGHT #13 Cerberus VS Warlords Black – PRELIM #1
Match #1
Both Teams come out and meet in the center of the list. Fighting starts hard and Warlords Black go all in with high energy. The first Warlord goes down on the right side of the list 15 seconds into the fight. The second one follows ten seconds later in the same area. Johny Porter walks to the bottom rail and drops a third Warlord with knees to the belly. He runs across the field and drops the fourth Warlord.
ANALYSIS
Johny Porter of Cerberus single handedly won the match. He dominated every person he stood against and dropped 4 of the 4 Warlords to go down. One with a takedown, one with strikes to the leg as an assist, one with knees to the belly and the last with a flurry of strikes and kicks as another assist. His actions show how violence of action can overwhelm an opponent.
Match #2
Cerberus moves fast towards the Warlords and gains a quick takedown 4 seconds in. The second goes down at the 10 second mark. A Cerberus fighter is dropped soon after making it 4/3 Cerberus. The 3rd Warlord gets tripped in the bottom left corner and 2 Warlords are swarmed by Yellow and Black. They get pushed over from the side and the victory goes to Cerberus 35 seconds into the Match.
ANALYSIS
Watch the switch at the top rail at the beginning of the fight. This is what wins it for Cerberus. This allows the Team Captain to get two takedowns in the first ten seconds of the fight. Despite the Cerberus fighter going down quickly at the bottom rail, Cerberus still keeps advantage and never gives it up. Video starts at the beginning of the fight. Watch the top rail.
FIGHT #14 Plague Rotten VS PK Peacocks PRELIM #2
Match #1
Plague Rotten suffers the first loss on the top rail after 15 seconds of skirmish. The second Plague Rotten goes down on the top rail seconds later. Peacocks push hard with a 5/3 advantage. The third takedown happens when a Peacock cross checks a Plague fighter hard into the rail. Peacocks try to check again but the Warlord ducks low and tosses him over his shoulder. It’s 3/2 Peacocks. The fight is stopped from a Plague Rotten armor failure and the Peacocks take a fast victory.
ANALYSIS
Peacocks have shown time and again that their fastest kills are from cross checks. When they set up the field to use this, they win. When they’re pressed against the rail, some of the Peacocks don’t have the staying power to remain upright. Peacocks are a big plus in general field awareness but need to work hard on their grappling skill. The Plague Rotten team shows a ton of promise. Their greatest weakness is in their stature. They are a relatively small in size team and that can be a general disadvantage if wrestling isn’t top tier.
Match #2
Plague Rotten is only able to field 4 fighters so Peacocks put one fighter in the corner to wait it out til the end. Plague Rotten comes out swinging with criss cross field checks to try and throw the Peacocks off balance. They lose 2 fighters in seconds. It’s 5/2 Peacocks. When 1 Peacock goes down on the top left rail, the back up enters the fight. A Plague Rotten fighter gets chopped down with axe blows in the bottom right of the list. Peacocks with the win.
ANALYSIS
Peacocks showed their strength in this fight. They stayed up, kept close to the rail and checked where they could. Plague Rotten was outgunned in their own game.
FIGHT #15 Cerberus VS Ordo Draconis
Now… these two teams are fighting next to each other in the 12vx12 battles. The match up will be amazing, but also friendly.
Match #1
When the fighting starts, both teams waste no time. There are top tier wrestlers and flankers on both sides of the match up. The first takedown happens on the top rail when Cerberus Captain pulls down an Ordo fighter taking a fellow Cerberus (Micah Krug) with him. The fight is 4/4. Ordo presses and gets another takedown on the top rail. Because the Ordo fighter went chest to chest on the takedown and stood back up, he waits to see if the Marshal calls him down.
The marshal says he can stay upright and Ordo has a 4/3 advantage. An Ordo fighter gets pulled down on the bottom rail and it’s an even match again. Both an Ordo fighter and Cerberus fighter go down when Ordo tries a takedown making it 2/2. The Final fighters for Cerberus are Johny Porter and Matt Creedican, so the last two Ordo are against two of the best grapplers in the league. Creedican pushes Colin Martineau over a pile of bodies and it’s 2/1 Cerberus! Johny and Creed work together to reap the leg of the last Ordo fighter to take the win.
ANALYSIS
This matchup was steady and dead even for most of the fight with every takedown getting matched by the other team. Cerberus worked hard to neutralize the cross checking ability of Ordo Draconis and stuck to a strict game plan of fighting on the perimeter. The plan faltered but payed off against a seasoned team of experienced fighters.
Match #2
Ordo pushes forward in an echelon with the bottom rail as point. They have changes to their line up with two solid flankers on the field. Cerberus responds by once again staying on the perimeter and not allowing flankers to find blind spots. Cerberus gets the first takedown on the top rail against Ordo. the brothers Micah and Daniel work on Andrew Barron on the top rail trying to push the wiley fighter down.
Meanwhile on the left rail Cerberus center gets a takedown but is also told to sit because Marshals say his knee touched the ground. It’s 4/3 Cerberus. The double team on the top rail pays off and the odds are now 4/2 against Ordo. The two Ordo fighters press together but are swarmed by Cerberus. Instead of taking hard axe shots, the Cerberus fighters opt to press for a kick trip to get the win.
ANALYSIS
Cerberus brought two things to the fight. 1. Strong grappling and 2. A solid gas tank. These are the Cerberus strengths and they used them to fight a dynamic and dangerous team. Ordo will beat ANY team that doesn’t pay attention. Their flankers are dangerous and their grapplers are very experienced. The only reason Ordo lost was because Cerberus fought to neutralize their flankers. Now… You can’t really neutralize flankers in a 12vs12, so remember that. Further, when top tier teams gain a takedown advantage they are careful not to lose it. When Cerberus got a quick kill in the beginning of the fight, it set the stage for a cascade win.
FIGHT #16 Warlords White VS PK Peacocks.
Match #1
Even though the Warlords showed a ton of strength all day long, PK Peacocks don’t back down. The first 30 seconds, the fight pushes to the bottom rail and remains dynamic. But the Peacocks quickly falter and two are lost seconds apart. 20 seconds later, Warlords take another Peacock down with a solid trip. By 3:50 mark, Warlords win 5/1.
ANALYSIS
Warlords dominated the fight with strong wrestling. Brett Skinner came out with a two handed axe and also dealt heavy shots. Peacocks fought hard but need to work on their grappling to be a more dangerous team.
Match #2
Peacocks keep most of their team on the top rail and try to set up a cross check opportunity. They press for it but lose two Peacocks on the top rail fast. The remaining Peacocks fight hard but two more go down 40 seconds into the match.
ANALYSIS
Same as above. If Peacocks want to be a team with sharp teeth, they have to be able to stay on their feet longer. If you can’t stay up, it doesn’t matter how fast you are or how hard you hit.
FIGHT #17 Ordo Draconis VS Peacocks. – 3rd Place Fight
This match up is one sided from the start as Ordo has very strong grapplers and dangerous flankers.
Match #1
Ordo starts the fight by pressing into the peacocks and letting their flanker Colin Martineau fly into a cross check. He crosses the other direction and trips taking a Peacock down. Ordo Axe man Kelly McKinn drops a Peacock with hard shots to the leg. Another Peacock is wrestled down by Wes Fenton right after. Ordo is up 4/2. One of the Peacocks in the top right corner falls from hard shield punches and the fight is stopped.
ANALYSIS
Ordo swarmed, overwhelmed and dominated the Peacocks. This fight was over in 23 seconds. It was the fastest win of the day by any team.
Match # 2
Peacocks take a hint and send in flankers hard right off the bat. They drop one Ordo fighter and another one soon after only losing one to the Peacocks rank. It’s 4/3 Peacock advantage! Ordo responds by having Bam Bam push a Peacock over a downed team mate and then immediately pushing another over on the same pile. A final Peacock goes down in the top right of the list and the fight is won in 18 seconds.
ANALYSIS
Ordo was on a rampage. An 18 second win is incredibly fast. They cemented a 3rd place spot behind Cerberus and Warlords white for sure. They showed themselves to be a top tier team who quickly dispatches most of the US teams.
FIGHT #18 Cerberus VS Warlords White – FINAL MATCH
Cerberus already lost to Warlords in the prelims but this doesn’t mean they are out. Top tier teams can change the matchup and greatly change the odds.
Match #1
The teams are tentative and don’t engage fast . Austin the axe man for the Warlords on the top rail wants to be able to knock people down and it’s obvious he’s trying not to get tied up. On the bottom rail, Craig Ivey and Brett Skinner press against Johny Porter and James Wolfe. Cerberus Center Matt Creedican goes after the Warlord Center. Both teams are fighting smart and it’s obvious the fighters are paying attention to the whole field.
At 40 seconds into the fight, no one is down and both teams fight hard. Matt Creedican is able to take down the Warlords White Center in the top right and the advantage is to Cerberus. Johny Porter loses his battle with Brett Skinner and Cerberus Captain and Matt Creedican leave James Wolfe to the wolves. Cerberus Captain directs Creedican to take on Brett Skinner and the odds are even. Creedican and Wolfe go down on the bottom rail leaving brothers Micah and Daniel against four tough Warlord fighters. Brennon and Brett stalk Daniel only to lose Brennon. The fight is 3/2 Warlords. Daniel Presses to get to his brother and crashes Craig Ivey to stand with Micah. Daniel presses an opportunity to try and take Brett down but Austin pulls, twists and accidentally takes Micah’s helmet off. The fight is a Warlords 3/1 win.
ANALYSIS
This was my favorite fight. I know I’m the Cerberus Captain and we lost, but I got to stand next to my brother with 4/2 odds against us and against the toughest team in the nation. We fought hard for two minutes and even got a take down in there. It’s matters not if we lose, but how we fight that makes us warriors. As far as tactics go… I got tons of thoughts but I’m keeping it to myself. 😀
Match #2
I’ll just say… watch the fight. It is almost three minutes in before both teams lose a fighter. It’s a great fight against two amazing teams.
ANALYSIS
Warlords don’t have a weak spot on their line up right now.